FREE Express Shipping On Orders €200
Currency
Setting up a Ruijie Reyee Access Point (AP) using the Ruijie Cloud app is highly automated. Reyee devices feature "Self-Organizing Network" (SON) technology, meaning they automatically discover each other and configure themselves with minimal manual input.
Here is the quick step-by-step guide to setting up your Reyee AP as a standalone unit or adding it to a new network using your phone.
Download the Ruijie Cloud app from the App Store or Google Play Store.
Open the app and create a free account if you don't already have one.
Turn on Bluetooth and Location Services on your smartphone.
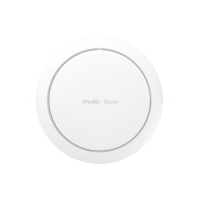
Connect your Reyee AP to your main internet router or PoE switch using an Ethernet cable. Ensure the AP's status LED is turned on and blinking/solid (indicating it has powered up successfully).
1. Connect to the default Reyee Wi-Fi: Go to your smartphone's Wi-Fi settings. Look for the default open wireless network broadcast by the new device. It usually appears formatted as @Reyee-sXXXX (where XXXX represents letters/numbers from the device's MAC address). Connect to this network. Note: There is no default password.
2.Open the app & detect the device: Launch the Ruijie Cloud app. Because your phone is connected to the AP's default Wi-Fi, the app should automatically pop up a notification stating "New device detected" or prompt you to set up a new network. Tap Get Started or Create a Network.
3.Create a Cloud Project: Reyee organizes setups into "Projects" for easy cloud management.
Choose a Project Name (e.g., Home_Network or Office_AP).
Create a secure Management Password. This password will be used to log into the technical settings of the access point in the future.
4.Configure your Wi-Fi name and password: You will be taken to the wireless configuration screen to set up your primary network.
Enter your desired Wi-Fi Name (SSID) (e.g., MyFastWiFi).
Set your Wi-Fi Password (minimum 8 characters).
Optional: You can check a box to keep the management password and Wi-Fi password the same, though keeping them separate is more secure. Tap Save or Deliver Configuration.
5.Wait for configuration delivery: The app will push these settings directly from your phone to the AP over the air. The AP will apply the settings and reboot its wireless radios. The temporary @Reyee network will disappear.
Final Step: Once the status light on the access point stabilizes (usually turning a solid green or blue, depending on the specific indoor/outdoor model), open your phone's Wi-Fi menu once more. Select your newly created Wi-Fi name, type in your password, and verify your internet connection. You can now manage, monitor, or reboot this access point from anywhere in the world using the app!