FREE Express Shipping On Orders €200
Currency
A Powerline Adapter Kit is a clever networking workaround that turns the existing electrical copper wiring inside your walls into a high-speed data network.
Instead of drilling holes to run Ethernet cables or relying on weak Wi-Fi trying to punch through thick walls, powerline adapters modulate data onto the electrical current, effectively turning every electrical outlet in your house into a potential internet port.
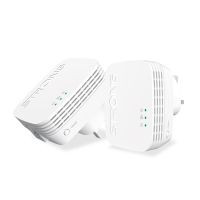
Powerline kits always come in a pack of at least two. For the smoothest setup experience, pair them in the same room first before moving the second unit to its final destination.
Note: This step is not always required as usually pre-paired.
Find a double wall outlet (or two outlets close together) in the same room.
Plug both powerline adapters directly into the wall sockets. Turn the outlets on.
Wait about 30 seconds for the power lights to stop blinking and turn solid.
Press and hold the physical "Pair" or "Security" button on the first adapter for 1 to 2 seconds (its power light will begin to flash quickly).
Within 2 minutes, press and hold the "Pair" button on the second adapter for 1 to 2 seconds.
Watch the LEDs. When the "Powerline" or "Data" light (often shaped like a little house or a plug) turns solid green or amber on both units, they are securely paired.
Unplug the second adapter (it will remember the pairing lock).
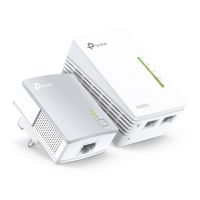
Take the first adapter and plug it into a wall outlet right next to your main internet router. Connect an Ethernet cable from the adapter into one of your router's yellow LAN ports.
Take the second adapter to the room where you have poor internet (e.g., upstairs bedroom, home office) and plug it directly into the wall.
Connect an Ethernet cable from that second adapter into your smart TV, gaming console, or PC.
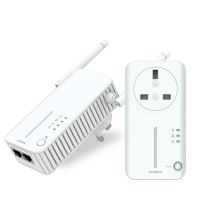
(Note: If you bought a "Wi-Fi Powerline Kit," the second adapter will also begin broadcasting a fresh Wi-Fi network in that room using the password printed on its back sticker.)
Zero Configuration DIY: There are no apps to download, no passwords to type in initially, and absolutely no holes to drill. It is a 5-minute plug-and-play solution.
Bypasses Thick Structural Barriers: Wi-Fi degrades terribly when trying to pass through concrete, brick, stone walls, or radiant heated floors. Powerline completely ignores these barriers because the signal travels inside the copper wiring around the room structures.
Low Latency Stability: For applications where stability matters more than raw bandwidth—like competitive gaming or Zoom corporate calls—a powerline adapter provides a much more stable ping (latency) than standard Wi-Fi, which is prone to sudden interference dropouts.
Speed Degradation (The "Box Speed" Illusion): If a kit is marketed as "AV1000" (1000 Mbps), you will almost never see that speed in real life. Due to electrical resistance and line noise, you will generally experience a speed penalty of 30% to 60% off the advertised capability.
The Circuit Breaker Barrier: The signal travels best when both outlets are on the same electrical circuit panel. If the signal has to travel from your main breaker box, out to a separate sub-panel (like a detached garage or a brand new home extension), the signal drops drastically or may fail to connect entirely.
Electrical Noise and Interference: Large household appliances that pull heavy or pulsing electrical loads—like microwaves, refrigerators, vacuum cleaners, and hair dryers—create "noise" on your electrical wires. When these appliances turn on, your internet speeds may temporarily dip.
Banned from Power Strips: Powerline adapters must be plugged directly into a physical wall outlet. If you plug them into a power strip, extension cord, or surge protector, the surge filtering technology will mistake the internet data signal for electrical noise and completely wipe it out.